No-Bake Cacao Date Energy Bites

Hellooo everyone! It’s been a while since I’ve made an appearance on the blog, though I continue to be active on my Instagram. I try my best to be more regular here, but alas real life (aka PARENTHOOD) gets in the way. Most recently, my little one has been struggling with some food allergies. I won’t get into all the details here, but long story short, her allergist suggested cutting out dairy from my diet since she’s still nursing. It’s been tough, but of course I will do whatever it takes to help my babe. And to be honest, it’s been kinda fun exploring the world of dairy-free recipes, a world which I NEVER thought I’d be a part of before!

And that’s how I came across these delicious energy bites. I’ve been seeing these no-bake healthy energy bites/balls all over the ‘gram and vegan websites lately and was determined to try them out to help curb my serious sugar craving. There’s a plethora of variations all over the Internet, but here’s a quick recipe that I tried out based on ingredients that I had readily available in my kitchen. The key ingredients here are Medjool dates (richer than regular dates and with a slight caramel flavor), high-quality cacao powder (I got mine from good ol’ Trader Joe’s), and some sort of nut butter. Apart from that, you can really customize this recipe however you want. These are the PERFECT afternoon snack for a quick pick me up, though I can’t promise you won’t finish them all in one go…try to be more disciplined than my hubby and I are 😉

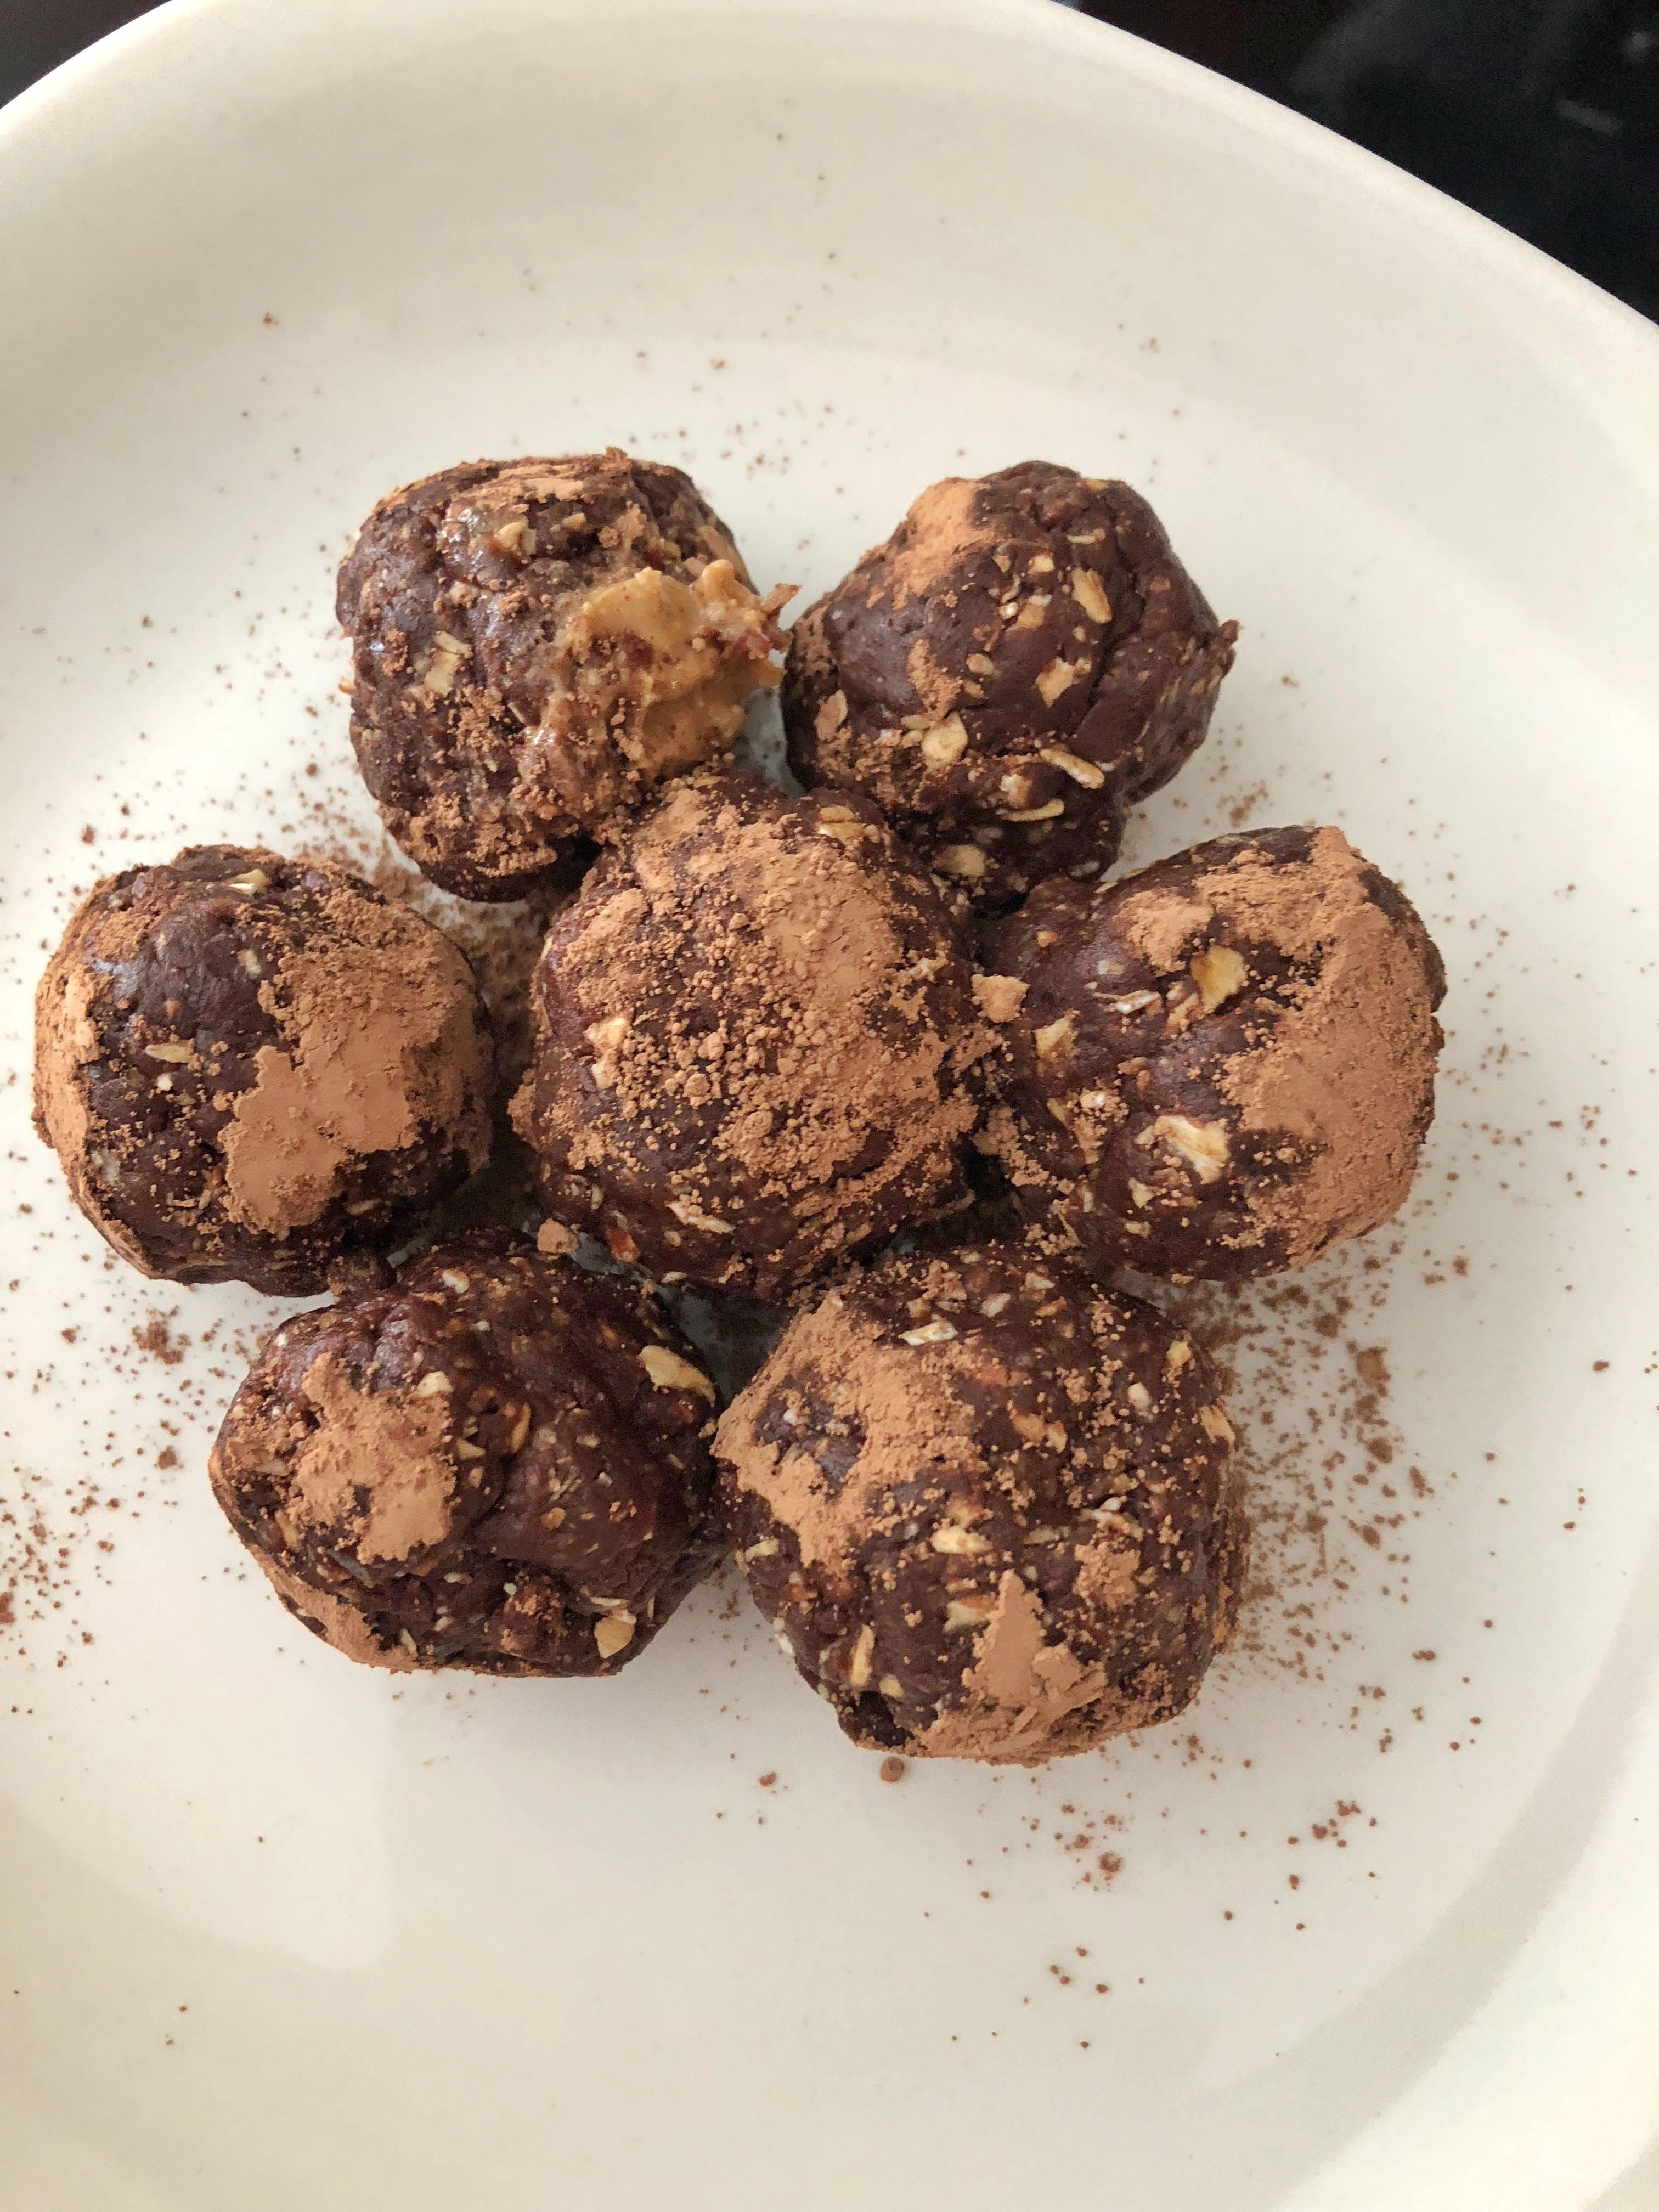
Ingredients (makes 6-8 bites) 

3/4 cup rolled oats
1.5 cups Medjool dates, pitted
1/2 cup cacao powder + 1 tsp for coating
1 tbsp smooth peanut butter
Pinch of sea salt
1 tbsp honey
1 tsp coconut oil

Directions

Throw all the ingredients in a food blender and blend, blend, blend. Add more coconut oil if needed to make more smooth. Take bite-sized pieces of the mixture and form into small balls with your hands. Place a teaspoon of cacao powder on a flat surface and roll the balls to coat them. Refrigerate and enjoy for a week! THAT’S IT.

Spicy Basil Shrimp & Turkey Rice Bowls

Of late, cooking has been a very calming force in my life. The past several months have been personally full of change and immense transition–I had a baby (the biggest change of all), I made the difficult decision to take a break from a wonderful job to focus on my daughter, my husband and I moved to the suburbs to be closer to his new job, and we bought a townhouse that is currently in construction. I view all these changes as positive and happy developments, but they are changes nonetheless. And change can cause momentary havoc and feelings of unsettledness.

It may sound trivial and silly, but being able to focus some of my energy on exploring new recipes and taking care of and feeding my family grounds me and gives me a sense of purpose during this period of transition. I’m no gourmet chef (not even close), but I’ve always enjoyed cooking, and I really love having more time to be able to think about the food I’m putting in our mouths. It’s a luxury I didn’t really have before, and I’m so grateful to have it now.

Our Friday nights in the city after a busy work week always used to be about ordering in greasy food and pigging out in front of the TV with Netflix. Now, I’m way more inclined to cook dinner even on a Friday night. Part of that might be because we’re in the suburbs and have fewer DoorDash/UberEats/Postmates options, but I also just feel so much better when we eat a good meal at home. And I don’t have to compromise on my cravings! This past Friday, I had some leftover shrimp, ground turkey, and tons of basil that I threw together for an Asian-inspired meal. Sometimes, these spontaneous dinners don’t quite work out, but the end result was surprisingly delicious and more importantly, SO quick and easy to make. Thirty minutes max. I can’t tell you the number of times I’ve ordered Thai or Chinese takeout on a Friday night and just felt bloated, sick, and disgusting after devouring way too much food. Cooking at home give me the chance to enjoy the cuisines I LOVE in a much healthier way.

Anyways, not sure what the point of my little introduction to today’s recipe was–guess I just wanted to acknowledge the role that food & cooking currently play in my life 🙂 Hope you enjoy today’s quick and delicious recipe!

Ingredients (serves 2-3) 

1 lb ground turkey
1/2 lb shrimp, peeled and deveined (you can also make this recipe with just 1 lb shrimp and nix the turkey – the sweetness of shrimp pairs perfectly with all the garlic and basil!)
1 tbsp sesame oil
3 tbsp soy sauce (just 2 if you’re cooking with just shrimp)
1 tsp honey
2 tbsp Canola oil
Red chilli flakes, to taste
6 cloves garlic, smashed and minced
1 tsp freshly grated ginger
Handful of fresh basil leaves (with the stems removed)

Recipe

Combine the sesame oil, soy sauce, and honey in a small bowl and set aside.

Heat 1 tbsp of Canola oil in a large frying pan or wok. Add the garlic and ginger paste to the pan and let heat for a few minutes. Once golden, add in the shrimp and pour half the soy glaze mixture over the shrimp. Stir well so that the shrimp is fully coated in the glaze and garlic ginger paste. Once the shrimp is fully cooked and slightly charred (a few minutes on each side), remove and set aside.

In the same pan (there should still be some of the leftover garlic, ginger, and soy glaze), add the remaining Canola oil. Add the ground turkey. Pour the remaining soy glaze mixture and mix well together. Continue stirring and frying the ground turkey for several minutes until fully cooked. Add the cooked shrimp back into the pan and stir everything together. Add red chilli flakes and additional soy sauce, depending on your taste. Remove from heat and immediately add the fresh basil leaves and stir until wilted.

Serve with brown rice and you’re all set! Enjoy your Spicy Basil Shrimp & Turkey Rice Bowl 🙂

PS. If you follow me on Instagram (@mrsgcg), you can view this recipe in my Story Highlights!

Creamy No-Cream Cauliflower Soup

I know, I know. I’m completely failing at posting regularly on my blog, but I promise you it’s all for good reason. Life has been a whirlwind lately with tons of travel and a busy work schedule, but I’m looking forward to things slowing down a bit for the summer. We’ve had a taste of some amazing weather here in Chicago, and I’m getting so amped for outdoor music festivals, day drinking, international travel (fingers crossed), barbecues, and experimenting with some lighter summer flavors in the kitchen. It’s gonna be a gooood, good summer. I can just feel it!

This time of year, I always find myself craving more veggies. My husband and I have been trying to incorporate one meatless meal at least once a week, and it actually hasn’t been that difficult to do. Veggie soups are perfect for helping us accomplish this goal – they’re easy to make, quite filling, and last for at least three days. I’m a lazy cook, so this is a big win in my book 🙂 Last week, I made a modified/healthier version of Food Network’s Cauliflower Soup and absolutely loved it. The best part about my recipe is that it was super creamy and sweet, with NO cream at all. Enjoy!

082F387E-B320-49A6-BCE0-45AE3E42C59F

Ingredients (serves 4) 

1/2 stick butter
1/2 onion, finely diced
1 carrot, finely diced
1 cauliflower head, cored and cut into small florets
2 tbsp fresh parsley
4 cups chicken broth/stock
6 tbsp all purpose flour
2 cups whole milk
Salt, to taste
Black pepper
Paprika, to taste
1 cup greek yoghurt

Recipe (*modified from the Food Network) 

Melt 1/4 stick of butter in a heavy soup pot over medium heat. Add the onions and cook until translucent, then add the carrots and cook until they begin to brown. Add the cauliflower florets, cover and cook over low heat for 15 minutes. The cauliflower should be very soft at this point. Add the parsley and chicken broth and let simmer for 10 minutes.

In the meantime, make a white sauce in a small saucepan. Melt the remaining 1/4 stick butter over medium heat. Whisk in the flour and cook for a couple of minutes. Add the milk and whisk to combine until the flour is no longer lumpy. Pour the white sauce into the pot. Add salt, pepper, and paprika to taste and allow the soup to simmer for another 20 to 30 minutes. When serving, place some greek yogurt at the bottom of the serving bowl, add the soup, and stir slowly. Creamy and delicious, with ZERO cream involved!

*Note that the Food Network recipe suggests that you can use an immersion blender to puree for a smoother, thicker soup. This is a great option, but I sort of liked feeling the cauliflower’s texture. And like I said, I’m a lazy cook, so love the added benefit of only cleaning one pot!